You can follow your traffic statistics straight from your Vorlik Website Dashboard thanks to Google Analytics.
- A preliminary step is creating a Google Analytics account and entering the tracking ID in your Website’s settings (see How to track your website’s traffic in Google Analytics).
- Go to Google APIs platform to generate Analytics API credentials. Log in with your Google account.
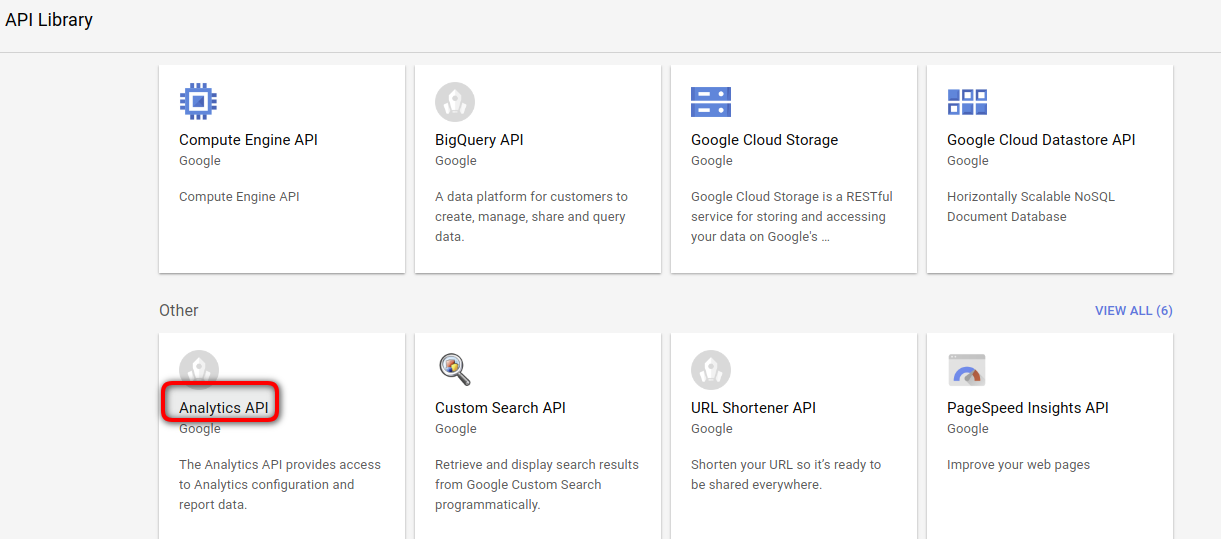
- Select Analytics API.

- Create a new project and give it a name (e.g. Vorlik). This project is needed to store your API credentials.

- Enable the API.

- Create credentials to use in Vorlik.

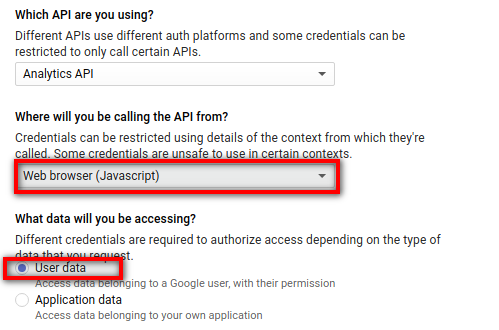
- Select Web browser (Javascript) as calling source and User data as kind of data.

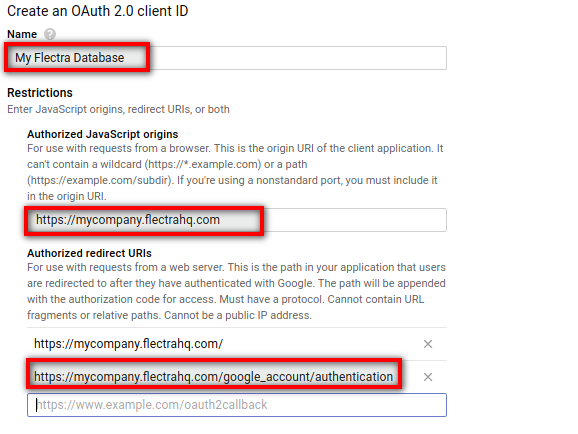
- Then you can create a Client ID. Enter the name of the application (e.g. Vorlik) and the allowed pages on which you will be redirected. The Authorized JavaScript origin is your Vorlik’s instance URL. The Authorized redirect URI is your Vorlik’s instance URL followed by ‘/google_account/authentication’.

- Go through the Consent Screen step by entering a product name (e.g. Google Analytics in Vorlik). Feel free to check the customizations options but this is not mandatory. The Consent Screen will only show up when you enter the Client ID in Vorlik for the first time.
- Finally you are provided with your Client ID. Copy and paste it in Vorlik.

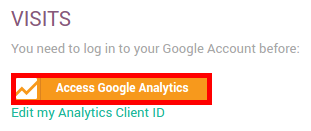
- Open your Website Dashboard in Vorlik and link your Analytics account. to past your Client ID.

- As a last step, authorize Vorlik to access Google API.
