Barcode Nomenclature
To start using discounts tags, let’s first have a look at the barcode nomenclature in order to print our correct discounts tags.
I want to have a discount for the product with the following barcode.

Go to .
In the default nomenclature, you can see that to set a discount, you have to
start you barcode with 22 and the add the percentage you want to set for
the product.
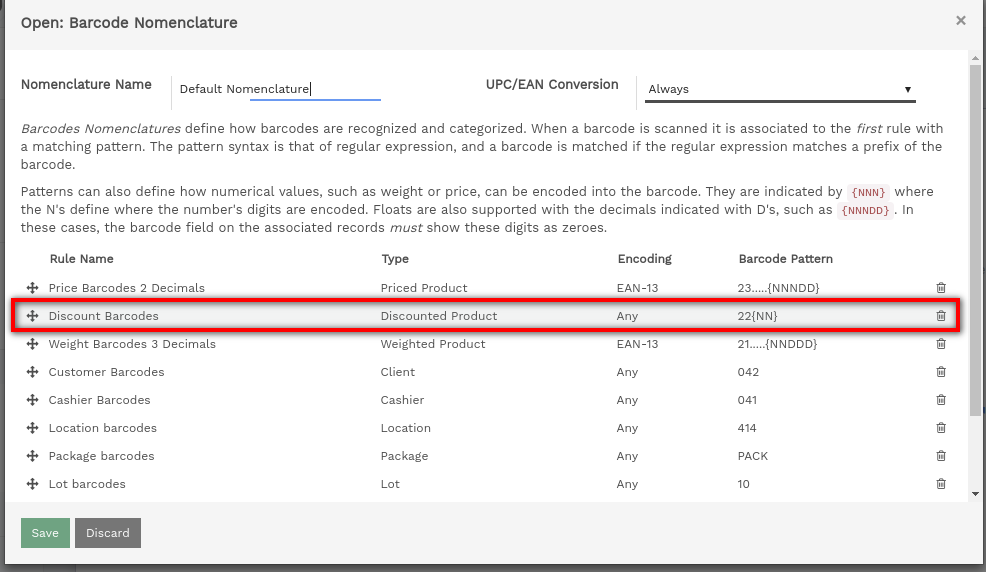
For instance if you want 50% discount on a product you have to start you
barcode with 2250 and then add the product barcode. In our example, the
barcode will be:

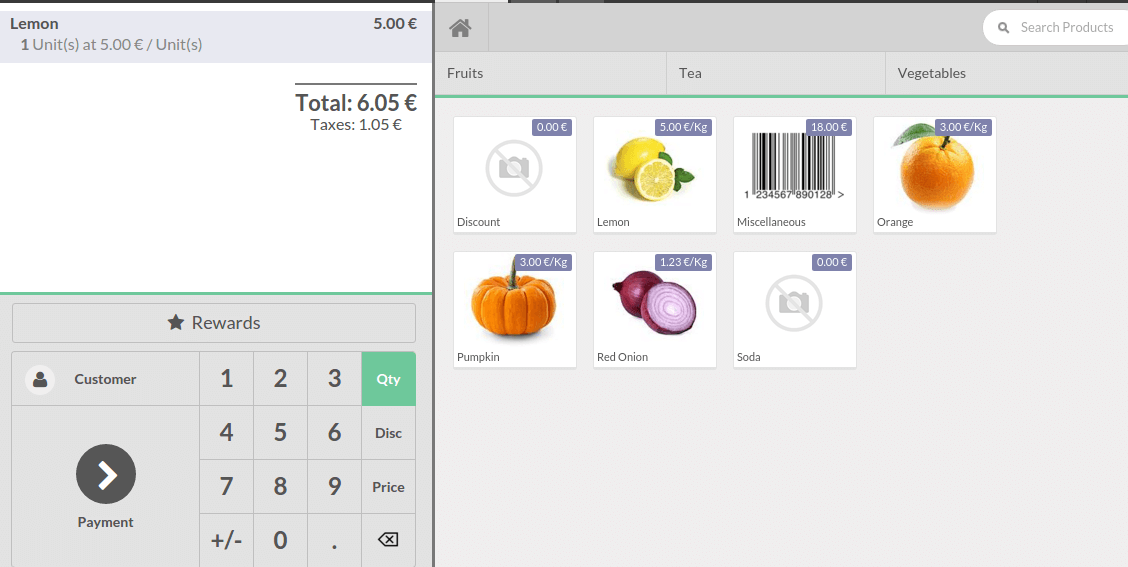
Scanning your products
If you go back to the dashboard and start a new session

You have to scan:
- the product
- the discount tag
When the product is scanned, it appears on the ticket
Then when you scan the discount tag, 50% discount is applied on the
product.
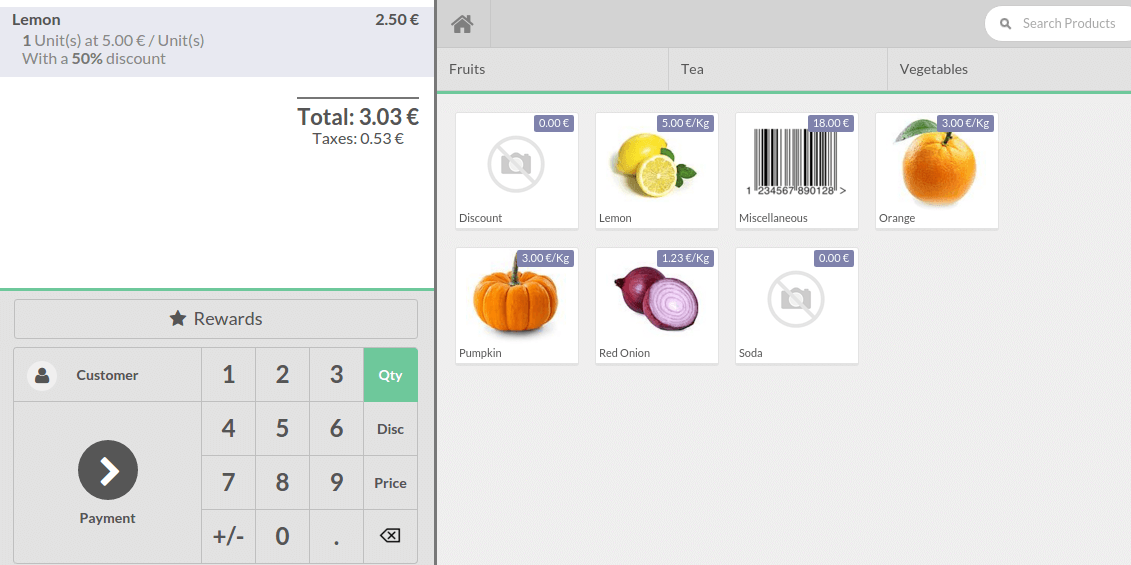
That’s it, this how you can use discount tag on products with Vorlik.