Introduction
This module provides the basis for creating key performance indicators, including static and dynamic thresholds (SQL query or Python code), on local and remote data sources.
The module also provides the mechanism to update KPIs automatically. A scheduler is executed every hour and updates the KPI values, based on the periodicity of each KPI. KPI computation can also be done manually.
Find the menu of KPI Digest from .
How to create Digest Email
There are four types of periodicity.
- Daily
- Weekly
- Monthly
- Quarterly
The periodicity describes it self. Whichever periodicity is selected will work according to the period. As the user changes the periodicity, the Next Send Date will change according to its time period.
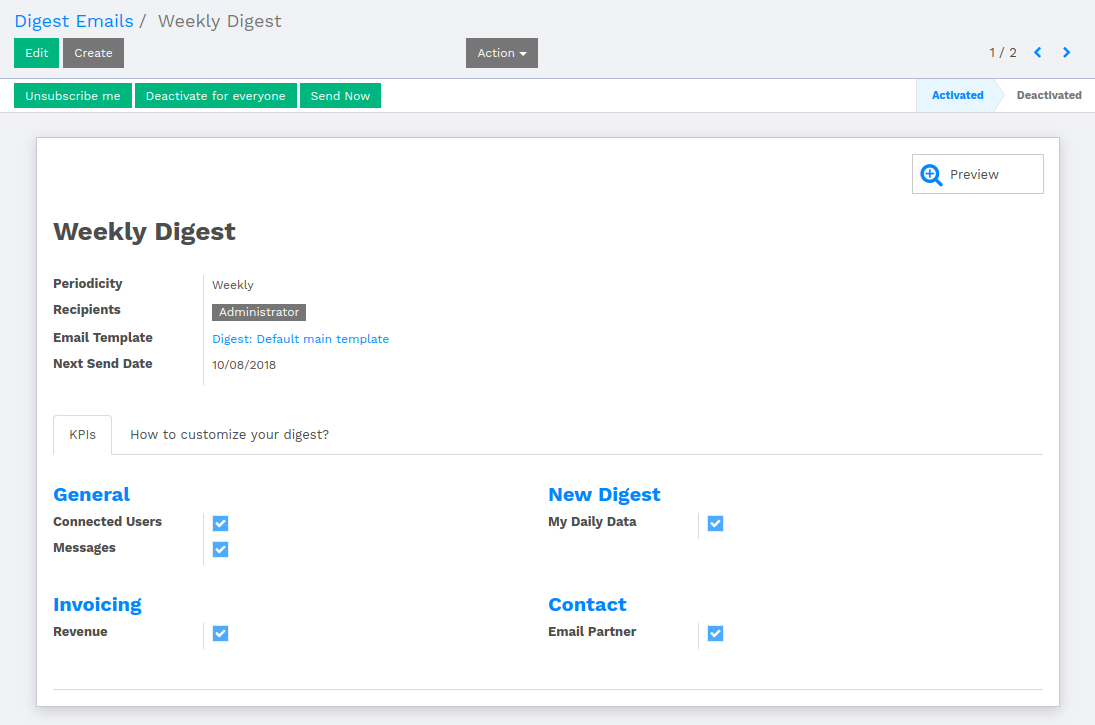
Recipient is the one who receives the emails from the system. The user can stop getting email from the system by clicking on Unsubscribe me button from the header.
The system provides the default Email Template to show off the digest data. User can also create their own Email Template.

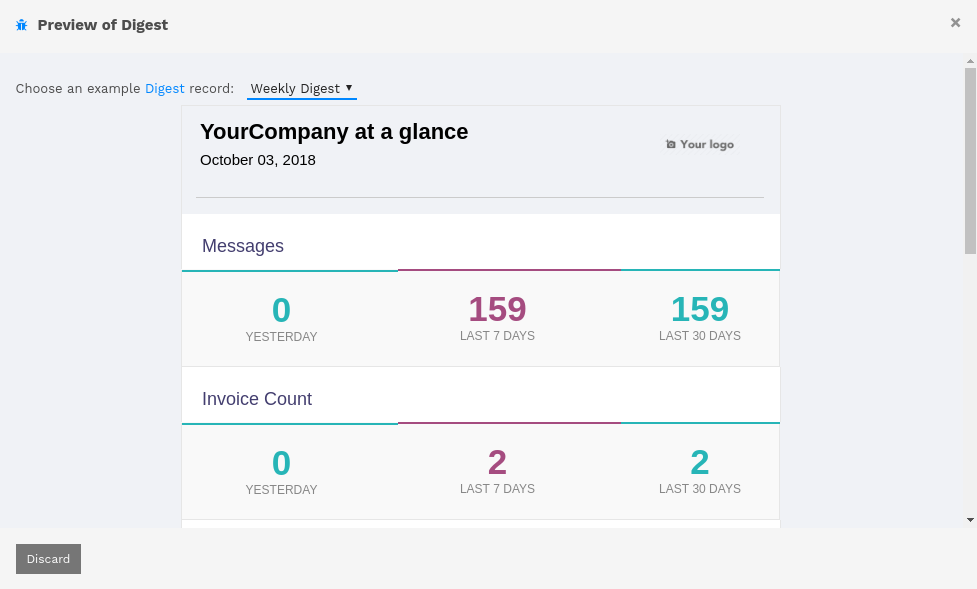
Under KPIs tab, there are some fields which will be considered as the source of the data. The user can preview the template by clicking on the smart button labeled as Preview.
Let’s say, If user wants number of connected users, messages, revenue and email partner then mark the checkbox against that label. Only those data will be available in preview whichever field is marked as true.
How to customize your digest?
Under How to customize your digest? tab, user is given two buttons labeled as Add Customized Digest and Remove Customized Digest where user can add their own customized digest and can remove their own.

The user is given the instruction to customize the digest under the buttons.
Add Customized Digest
By customizing the digest, it will create a field with a type of checkbox, which will be reflected in the digest report.

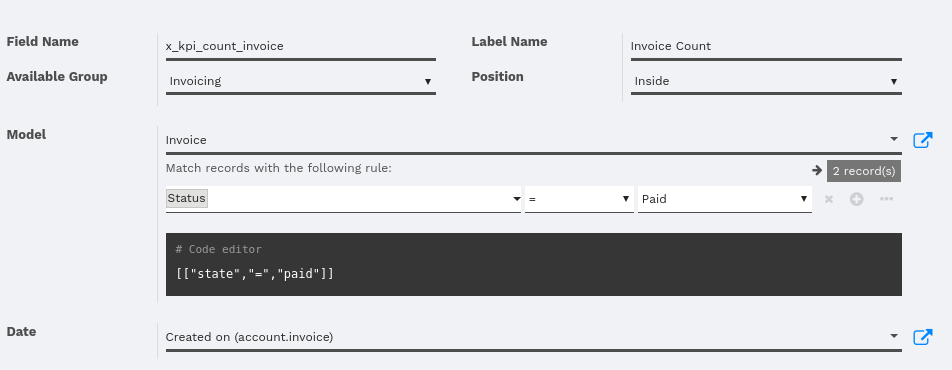
The name of the Compute Field Name and Compute Function will be changed as the user changes the name under Field Name field.
Label Name is the label how the field will be labeled with.
The next step is to set the position of the field. The field has to be inside the group. So the user has to select the group from Group Name. It will only show those groups which are under KPIs tab.
There are three positions of the field.
- Before
- After
- Inside
If the user selects Before or After, that means the user has to create a new group and will be set according to the position. The field will be generated inside that newly created group.

If the user selects Inside, that means the newly created filed will be set inside the selected group.
The system will retrieve the data according to the filter. To set filter over data, select the model and add filter by clicking on green button labeled as +Add Filter.
That will allow the user to select the field and the value against it.
The python preview will be shown that how the filter is applied.
the compute field name will be generated based on the field name. The user is supposed to set the type of the field either it should be Integer or Monetary.

The system will generate the code according to the models and filters, which creates a compute function and will retrieve the desired data.
for record in self:
    start, end, company = record._get_kpi_compute_parameters()
    record['x_kpi_count_invoice_value'] = self.env['account.invoice'].search_count([["state","=","paid"],["create_date", ">=", start], ["create_date", "<", end]])
The user is also given the help under Help tab, which will help to develop the compute filed.

Once the procedure is completed, the filed will be added at appropriate and desired place. The data of that field will be available if the field (checkbox) is marked as True.

Remove Customized Digest
The user can remove the unnecessary customized digest. On clicking Remove Customized Digest button, a parametrized window will pop up.
There will be two options under Remove Type field, Group and Field.
If Group is selected, then it is necessary to select the Group under Available Group.
If Field is selected, then it is necessary to select the digest field under Field.

The system will remove the Group or the Field under the Group from the checkbox list.